Electric Locomotive
Project
Paul Jorgenson
2014-2018
Last update: 6 March, 2018 -- Scroll to the bottom to see the latest.
I built an electric locomotive which will runs on 7.5" track (about 1/8 scale of 'standard gauge'). This track is widely used for model train tracks for "ride on" size models. My locomotive is of my own design and built all by myself.
This is a kind of “builders log” (as it was a “design on the fly”) and some photos and information about running it.
In 2014 I went to a thrift store for something else, and found two “boat seats” that were just like the riding seats on the 7.5” gauge that I had run with my friend, Dick Peterson (KE7Z), at his track in Port Angeles, WA and at Train Mountain Railroad in Chiloquin, OR. It always has to start somewhere…
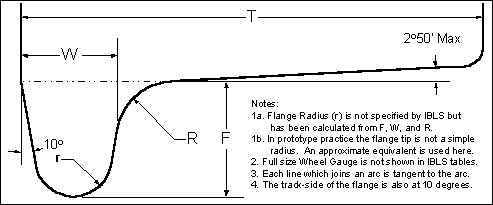
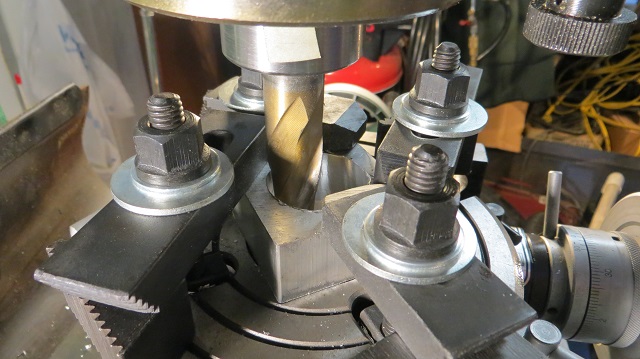
To start out in earnest, I had some wheels which were cast iron which I bought on eBay also in 2014. The cast wheels are intentionally oversize so that they can be machined to the exact specifications for the scale. There were 16 machining operations in total to get the wheels to size and the proper profile shape. The following are some photos of a finished wheel.
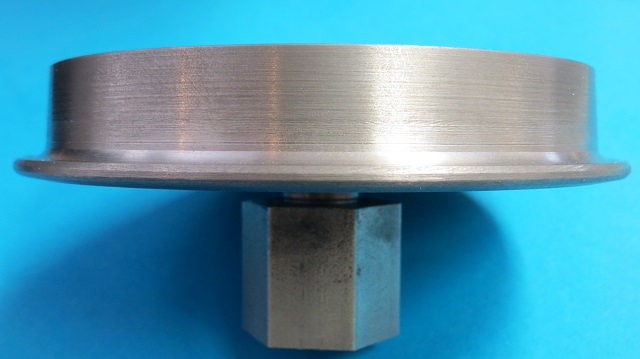
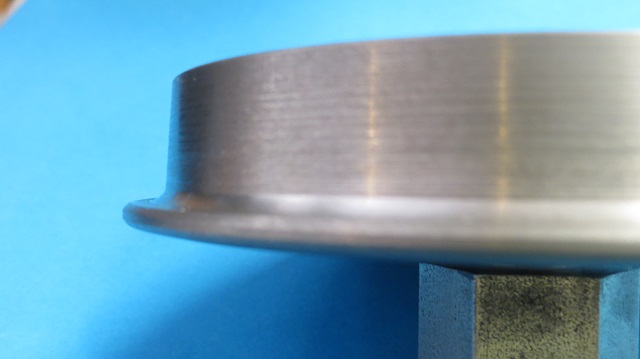
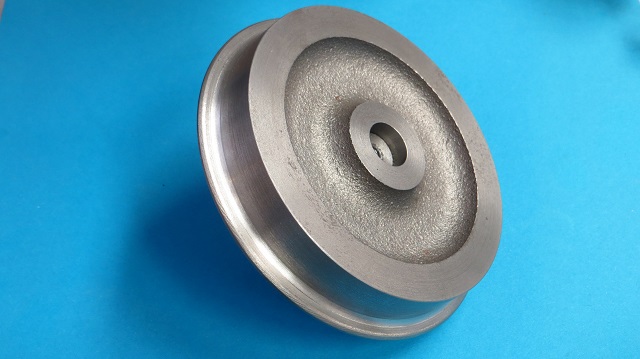
Yes, there is an intentional angle to the wheels, just under 3 degrees.
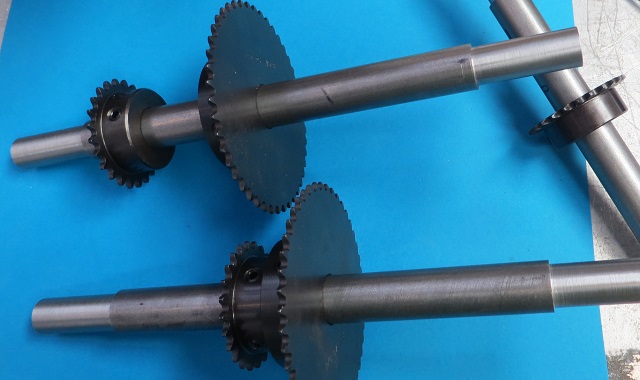
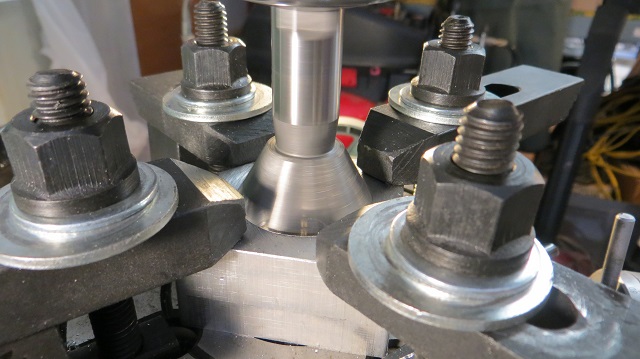
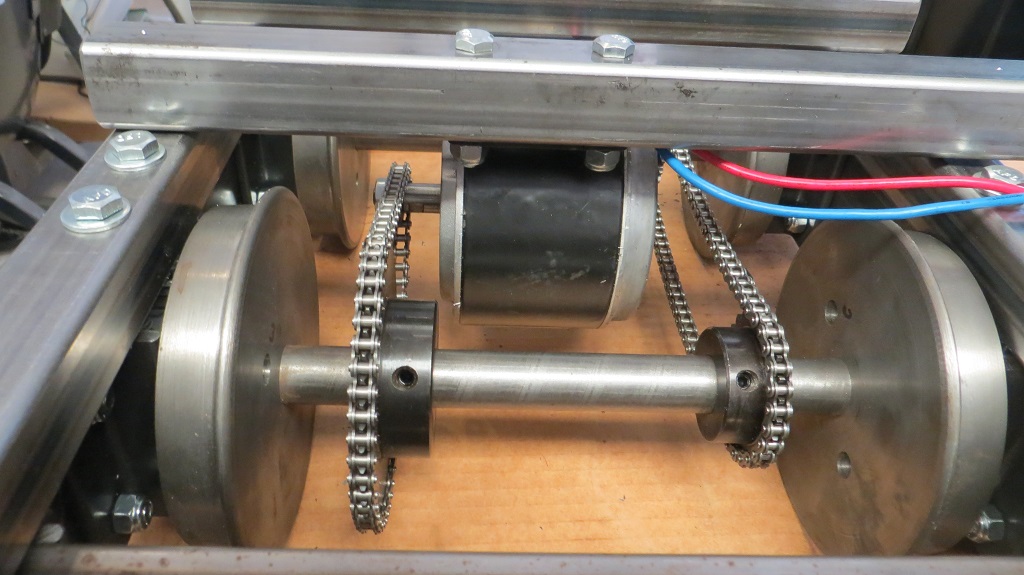
The next items built were the axles. There is a cut on the ends of the axles to accept the wheels and bearings. The back to back distance is critical for the wheels if the train is going to stay on the track. It is set by the cut on the axle and is within .001" of the specification. The axles have the chain sprockets on them. The electric motor drives one axle which has a large and small sprocket. The small sprocket drives a chain which will go to the second axle in the truck or wheel set. So, both axles are driven by a single motor. There are two trucks, so I have four driven axles (8 wheels, 4 axles, 2 motors, 1 engineer...).
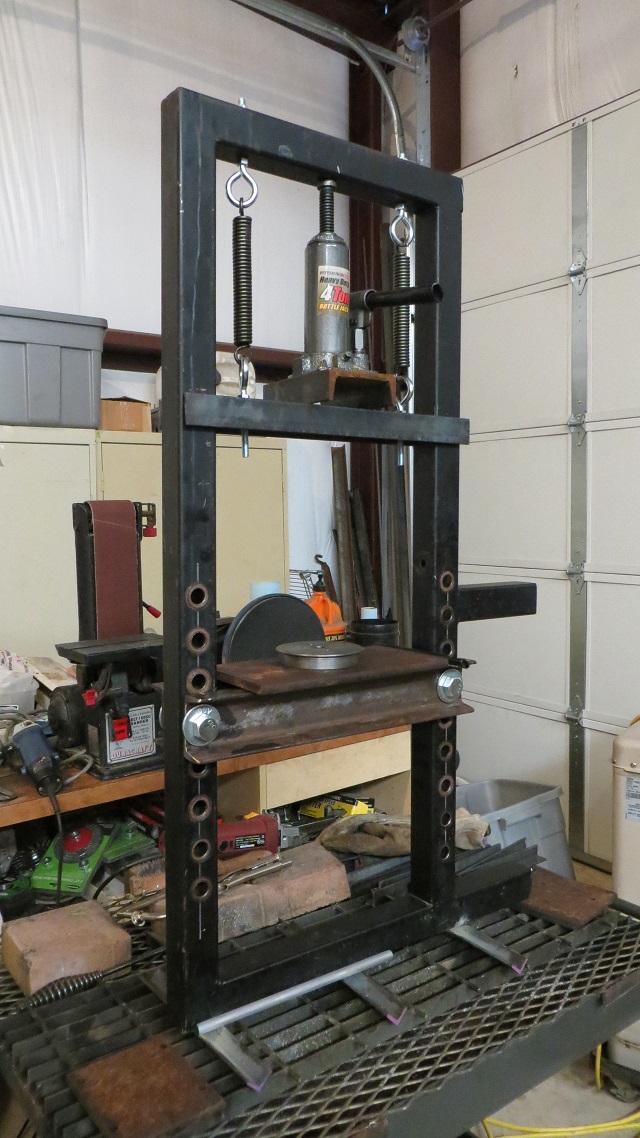
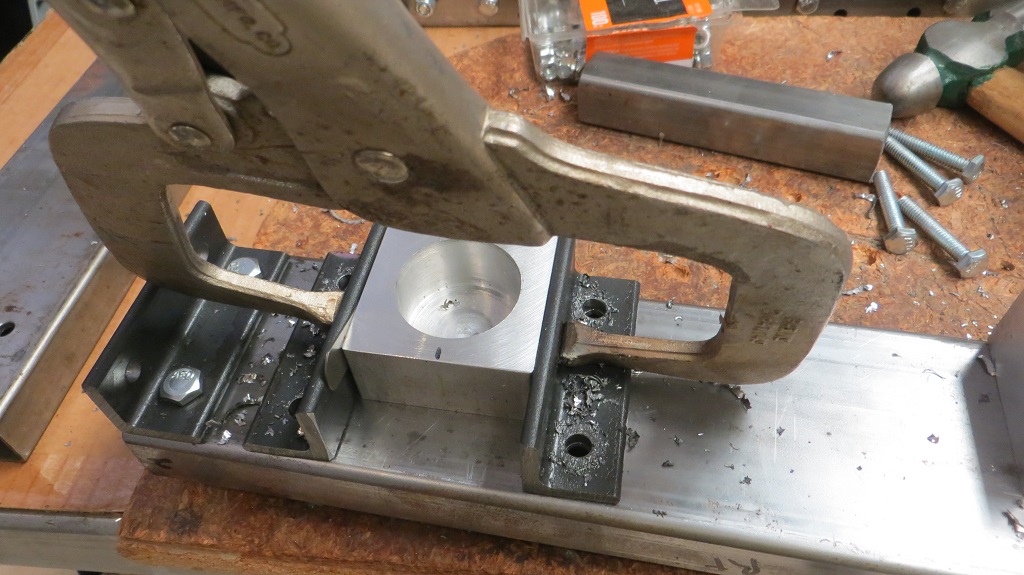
I did not have any tooling to press the axles on to the wheels, so I built a press from salvaged steel and a new jack.
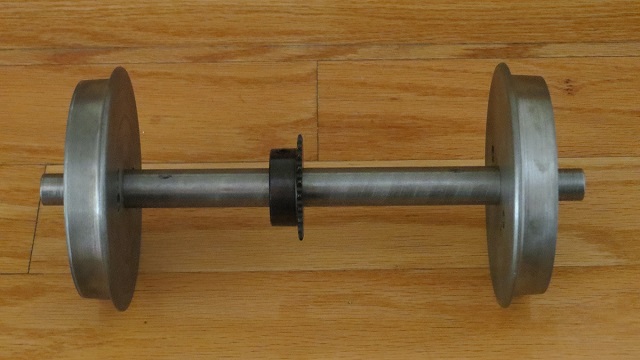
The fit between the hole in the wheel and the diameter of the axle is very tight, about .0015" - a nice tight press fit which will not rotate on the wheel. To make the pressing easier, I put the axles in the freezer over night and put the wheels in a toaster oven for a couple of hours at about 300F. This helped the press and the wheels are now firmly attached to the axles.
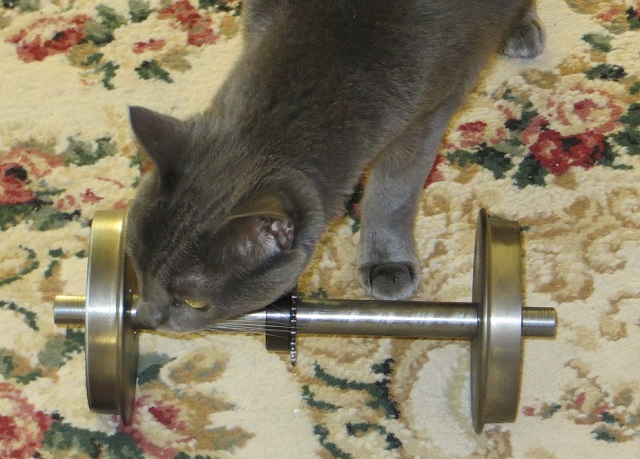
Joule approves!
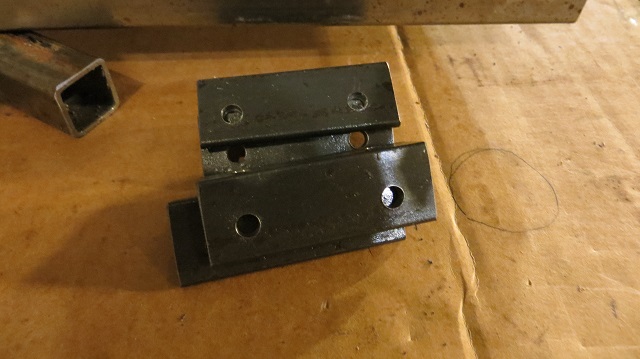
The next step was to make the bearing blocks to take the two ball bearings which will be outside each of the wheels. The bearing blocks are made out of aluminum. I may make them out of steel if the aluminum ones wear out too fast. I sawed, then milled to thickness, each piece of aluminum.
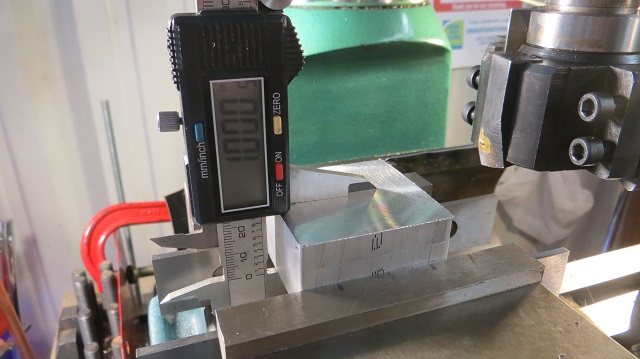
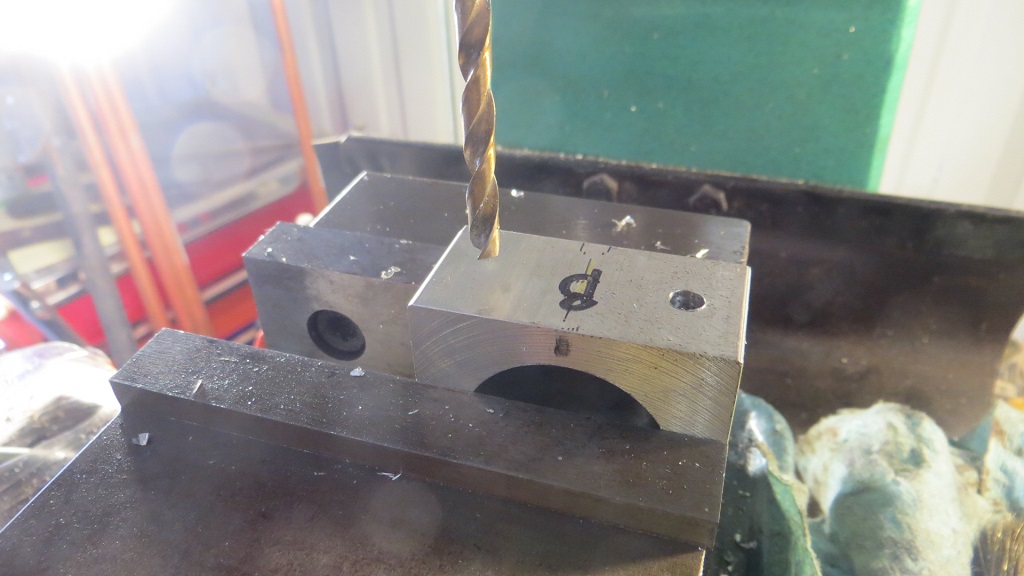
I tried several methods before settling on what I did to mill out the pocket for the bearings. Since at the time I did not have a good boring bar setup for the lathe, I used a rotary table and my milling machine. I built a tool to go in the same collet as the end mill, to center the rotary table under the quill of the machine.
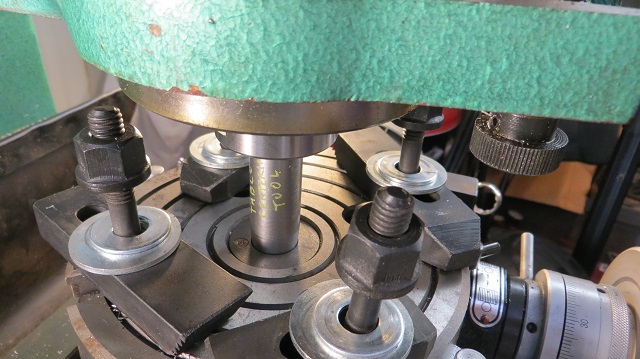
I also built a pointed tool to go right to the center of the block and hold it while the block was squared to the table (important later...) and clamped into position.
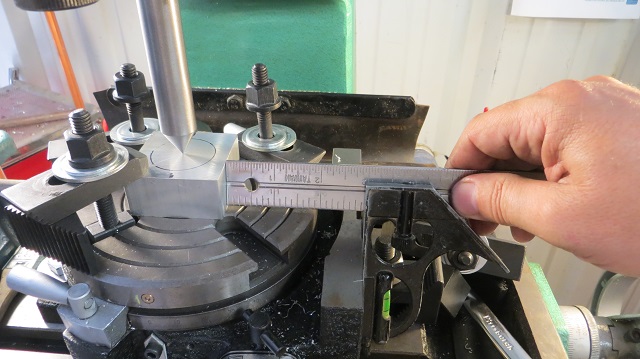
The pocket was rough milled with an end mill which was .75" diameter. Several passes were required to get to the 1.375" diameter of the bearings.
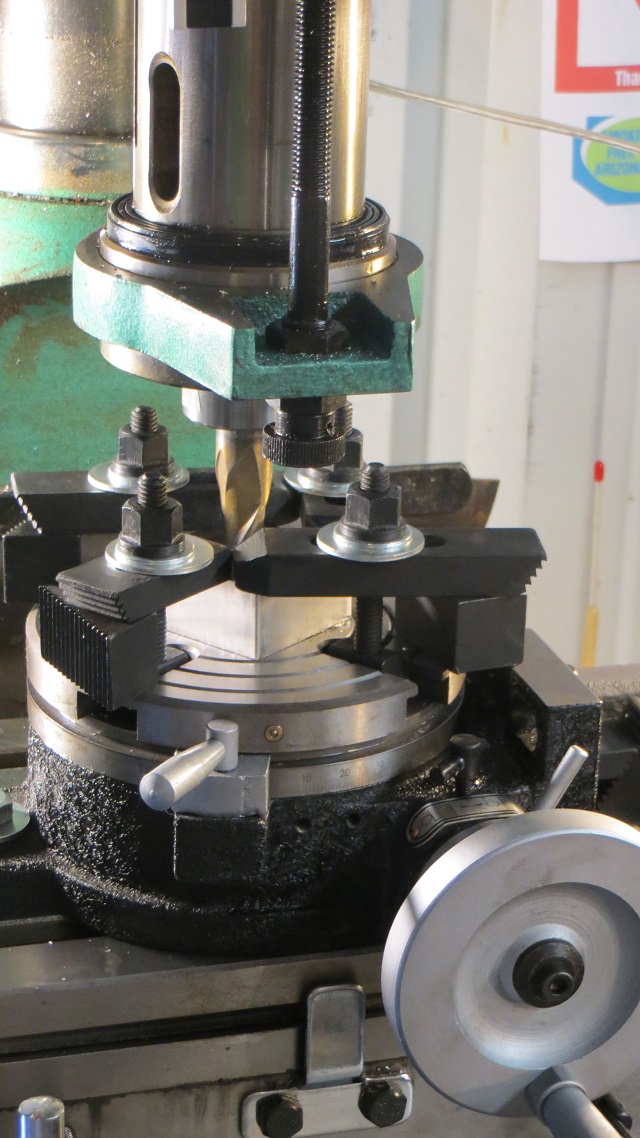
The bearings need to move up and down, but not fore and aft. The up and down requirement is for track that might not be even. The wheels might move up and down my almost a half an inch, unevenly – I wanted flexibility in the vertical angle that the axel could move. I did some calculations and found that I needed to allow for .050" of movement up and down. Now the squaring of the block on the rotary table comes into play - the table was set to zero degrees and the milling table was moved the required distance. I used a dovetail cutter which is the same size as the bearings to make the final size and extended up and down cuts. It cut the aluminum very easily and left a nice finish. If I do other blocks in steel, I will likely have to find another way.
To see the final result of the bearing block pocket milling, click on one of the links below to see a short video. The video shows the hex tool that I made for holding the wheels in the lathe during several of the operations there. The noise in the background is the evaporative cooler trying to make the shop bearable. It was 104F outside and 90F and 90% humidity in the shop at the time of the video. Did I mention it is hot in Phoenix during the summer?
I hope that the video makes it clear. It is WAY better than me drawing a picture... The bearing is held closely in the direction of travel and can move vertically some, which also allows it to tip at an angle a bit.
I next drilled and tapped the bearing blocks so that they attached to the square tube steel frame of the truck. This turned out to not be enough freedom of movement and I went another way. Engineering on the fly.
I fixed the bearings on the end of the axles and placed the sprockets in their positions. This allowed me to measure the desired distance between the axles and then cut the chain to fit. I cut enough chain to have the required amount plus a couple of spares. This turned out to not be the right time to cut the chain. See below...
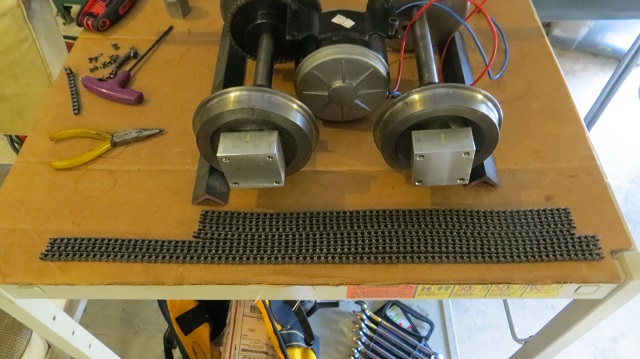
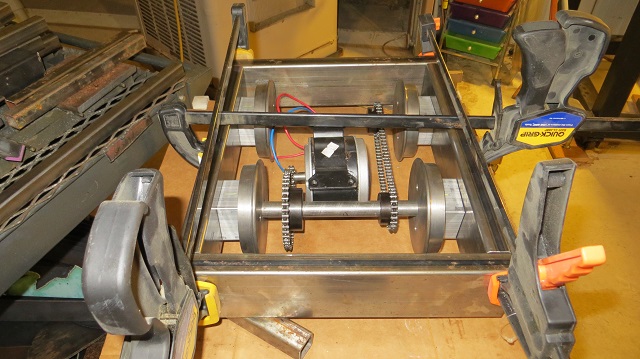
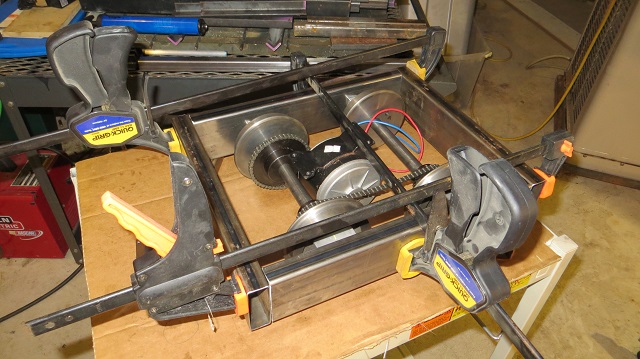
It is started to look like more than just a collection of parts! The 24 volt electric scooter type motors I bought (cheap) from a guy that had ideas for a project but it never materialized. If I had to buy them replacements, there are similar motors available on eBay or from places like Electric Scooter Parts where I got the chain from. The sprockets were ordered from somewhere that I can’t remember… I built a spreadsheet to calculate the speed required (7 MPH) from the wheel size and then calculated the gear ratio to get that speed. It turns out that the motor spins faster than the nameplate rating, so the top speed is higher than the calculation, but it works! The large sprocket is just about as large as will fit on this size of wheel.
I tried out a couple different truck frame methods (the truck is the set of wheels, in this case two axles per truck). Since I totally built this without plans, this is how the process works. I settled on using some 1 x 3 rectangular steel. I cut all of the parts and did a fast fit up using some clamps to hold the parts together. It gives a good impression of what it looked like in the end.
The truck frame was bolted together using some very stiff steel angle stock. I cut the parts and put the holes in the corner brackets. I match drilled the truck frame next to fit the angle pieces.
Some
time passed in the middle of the build. I got involved as an electronics and
Air Traffic Control specialist in the helium balloon project to fly two guys
across the Pacific Ocean (Two Eagles Balloon Project) and some other projects
which took much time. Many months later, I finally got back to the electric
loco project (some think I am the loco one...).
The arrangement for the bearing blocks did not allow enough freedom of movement for the axel and wheel, as noted above. More travel was needed to allow the train to stay on the rail with rough track that is out there. After much thought, I came up with turning the bearing blocks into journals and built angle sides for the journals to slide up and down on. The top of the journal has two bolts which capture the journal and springs. The bolt goes through a cross bar which will keep the wheels from falling out the bottom of the truck and give a good surface for the springs to press against.

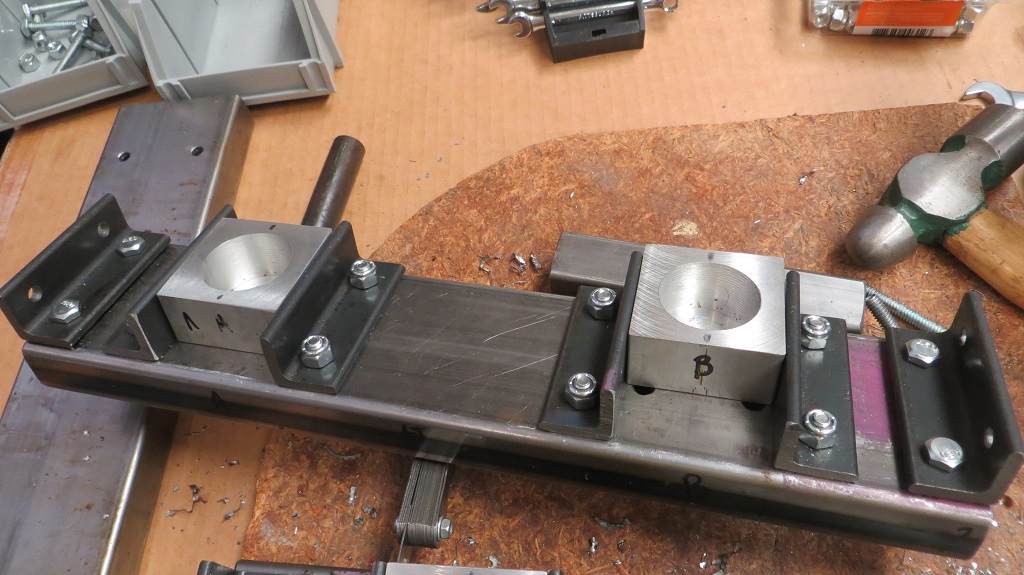
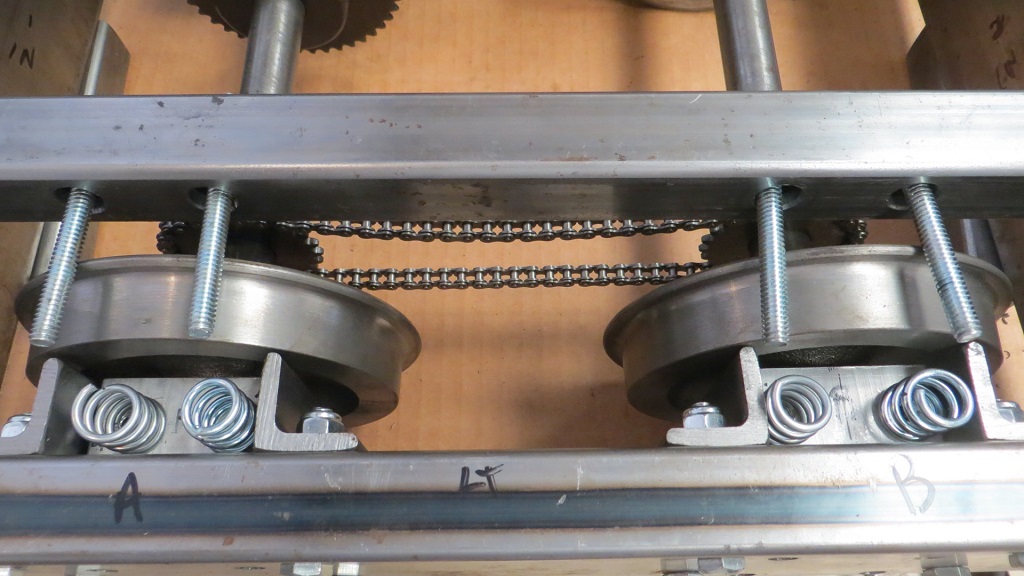

The side frames were drilled to accept the journal side pieces (made of the same angle stock I used to hold the frames together) along with a bit of clearance provided by a "feeler gauge" of .035". This little clearance will still allow the journals (bearing blocks) to stay in position but ride up and down freely on the track.
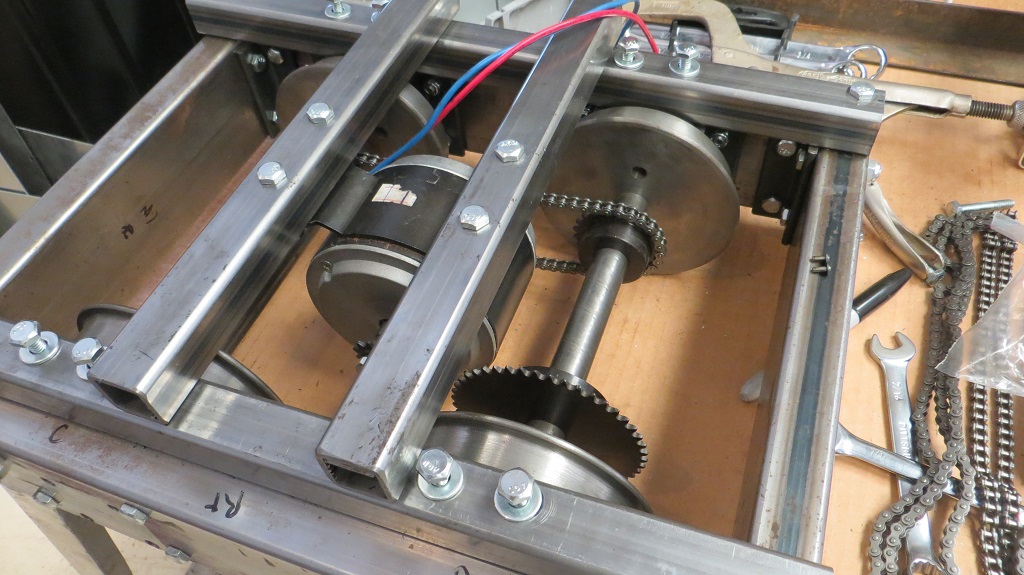
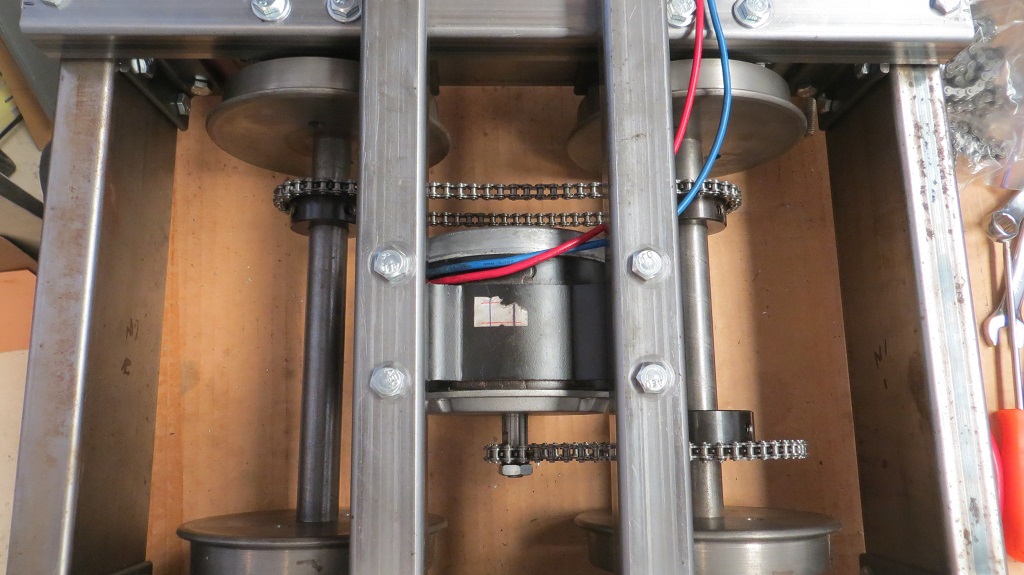
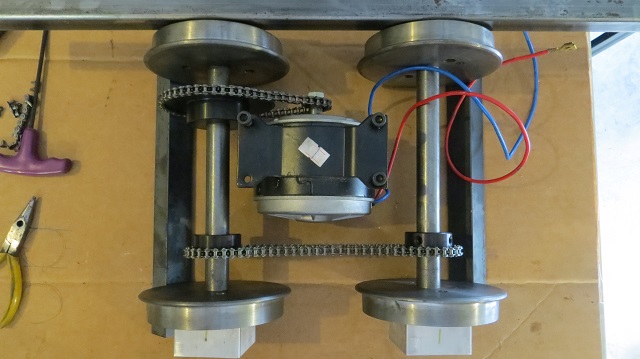
After this was solved, the motor mount was drilled out to take a 1/4-20 bolt and nylon lock nut, and was mounted to a cross bar which is bolted to the truck frame. The chain pieces that I had cut when I was anticipating another motor location were now too short (don't get ahead of yourself...) and new chain was obtained. There is enough adjustment in the mounting to install and work on the chain, if needed.
The motor controller was wired to the throttle control and a switch for forward and reverse for testing. There was a failure of the throttle control and I spent more time trying to get it to work that I should have, and then went on to a linear variable resistor which works fine. I later went to a commercial joystick type control which can do forward and reverse on the same stick and is self-centering at the stop position.
I made a very short video of the progress which you can see by clicking the link below.
More Progress Video (wmv format)
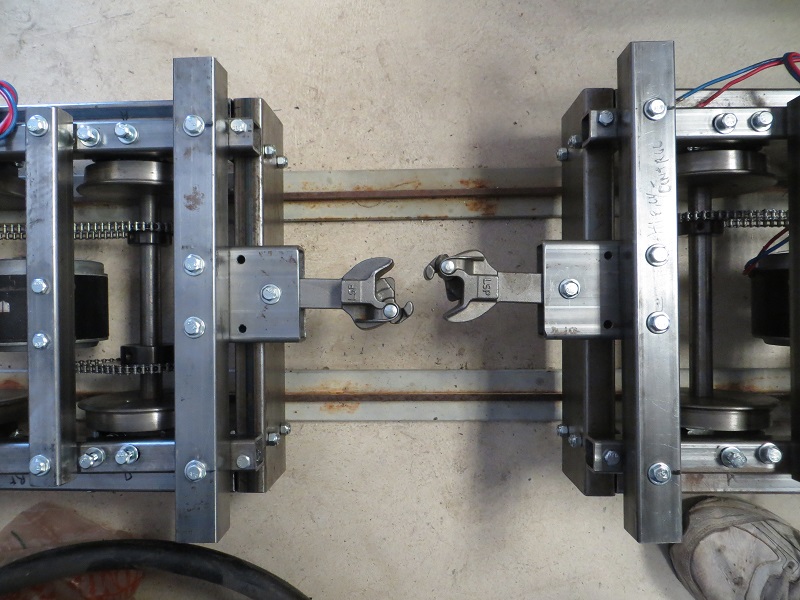
Next, I built the drawbar assembly which holds the two trucks together and the couplers attached. The couplers allow the locomotive to connect to other equipment when and if desired. Couplers are on the front and rear of the locomotive. The couplers came from Live Steamer Parts.
Couplers
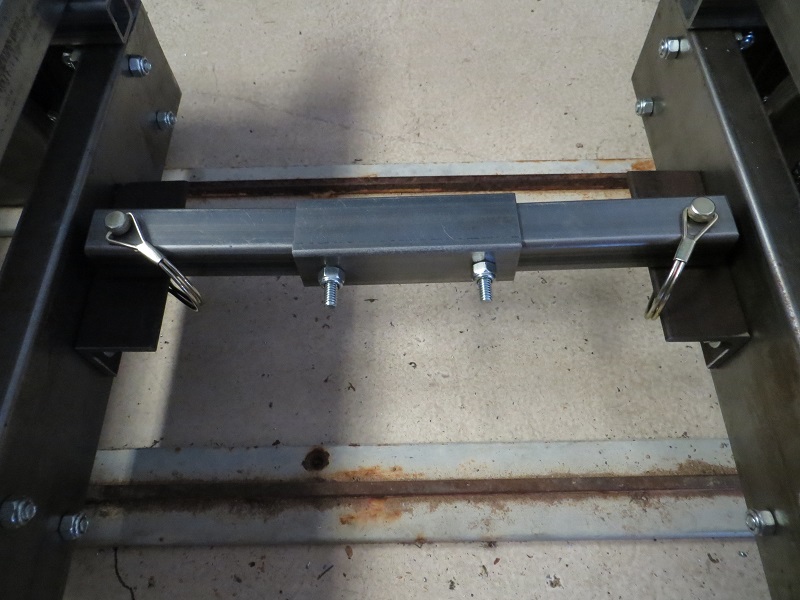
Drawbar
I shot a short video showing the couplers doing their thing.
The couplers have some rubber hose material as a “self-centering device” so that hooking up to other equipment is easier.
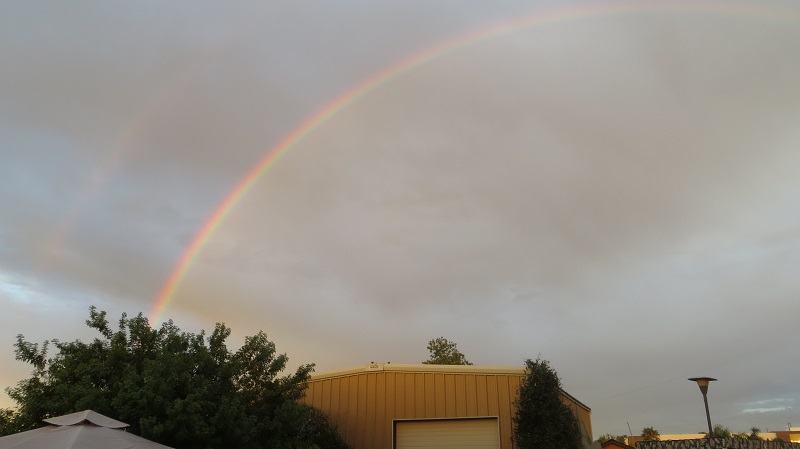
With the double rainbow over the shop, the project must be nearly complete or at least complete enough to take to Train Mountain to run!
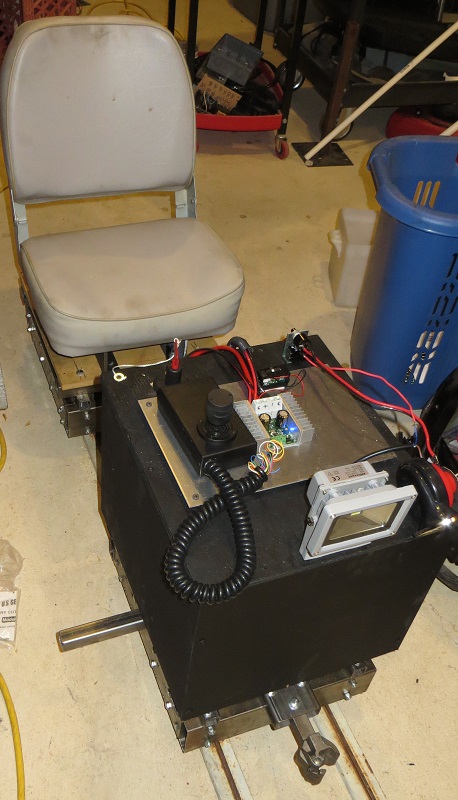
Lots of work, lots of detail work, was required to get it ready to run on a real track. The two group 27 deep cycle batteries were installed in the front car (24 volts for the motors) and the seat attached to the rear car. Everything is in balance - the batteries sit over the front wheels and I sit over the back wheels. The wiring for the motor controller, light, and horn were finally all in place and everything worked! The self centering joystick is a very sensitive setup with lots of power from the controller to the motors.
Since one of the design goals was for it to all break down into pieces that will be easily lifted into my Prius for travel, the electrics are all on quick disconnect connections (Anderson Powerpole). This also allows any part of the system to be isolated from the batteries, if needed.
So, there she sat in the shop all ready to run. I have some track that came from an old floor mounted trolley system for a photo enlarger that I salvaged years ago. It makes for fine rail to run on for a few feet in the shop.
I made a few seconds of video to show what it does. Late night video after a long day.
Click here to see it running in the shop!
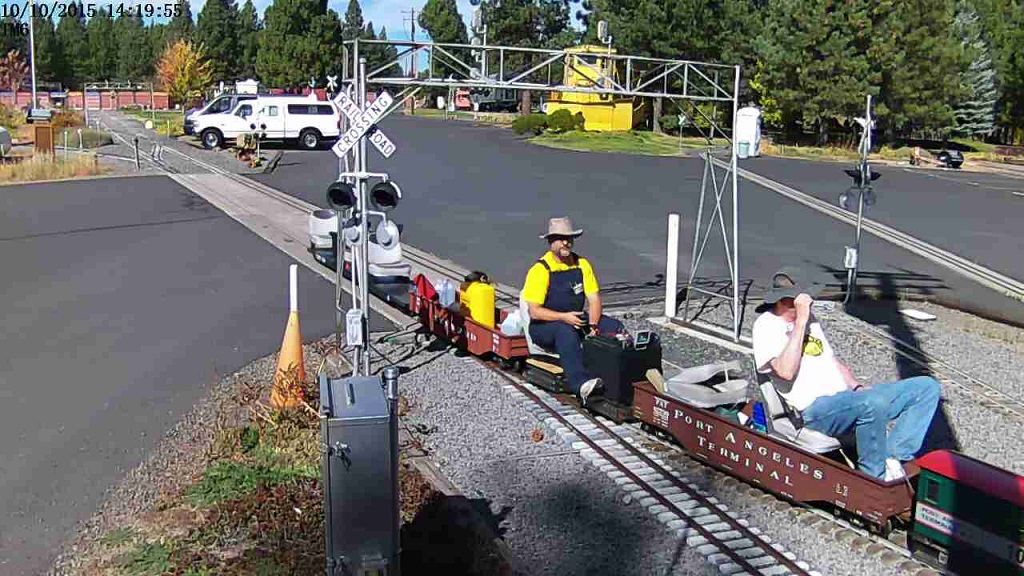
Running At Train
Mountain - Fall Colors Meet!
With the locomotive complete enough to travel; I set off for the Fall Colors Meet 2015 at Train Mountain - a two day drive from Phoenix. Arriving at Train Mountain on Friday afternoon, I unloaded onto the "steaming bay" at Crisp Yard. It fit perfectly on the rail (which means that I had the gauge right), and it rolled easily due to the double bearings on all wheels. There was some interest by other people since this contraption had not been seen by the train running public up to this point. Since it is a totally homebrew design doing a few things that others have not done before, there were many interesting questions.
After fitting the batteries and hooking up the wiring, it was time for a test. It ran back and forth on the yard track very well. There was good acceleration and the braking action of the regeneration of the motor and controller combination worked well, too. The motors basically turn into generators when slowing down and put energy back into the batteries with the help of the Dimension Engineering SyRen 50 controller. Works just like my Prius!
Now, it was time to go hook up to a car and see how it pulls. I went around the short way to the Central Station and picked up one of the Train Mountain fire cars. TM keeps fire cars for visiting folk like me to use during the fire restriction times of the year. My friend and mentor, Dick Peterson, followed and reported that the action of the locomotive around the curves and bumps looked good. It was time to take the machine out for a run! The Serpentine was selected and away we went down the mountain.
First run at Train
Mountain!
Dick
was following with his electric.
Everything ran very well! We went down the mountain to the lower meadow and then back up the steepest part of Train Mountain - 3.69% grade. There were no issues - the speed control is good, the braking action is good, and on the really good track going up the steepest hill I was able to accelerate! By now it was time to check the motors for heat and inspect the rest to see if anything had come loose, so it was back to the parking bay. The motors were warm but not hot to the touch and everything looked good. The batteries were also recharged to full capacity for further running.
Then it was time for further load testing, this time with a passenger car attached. Running around the top to Central Station, I picked up a three person car to add to the train. Dick rode the passenger car and we made another run down the hill and back up with no problems. It was time for dinner, so we dropped off the passenger car back at the Central Station and went to the parking bay to recharge for the night.

Parking at Crisp Yard. My locomotive (the black cab) and Dick’s #10 next to each other.
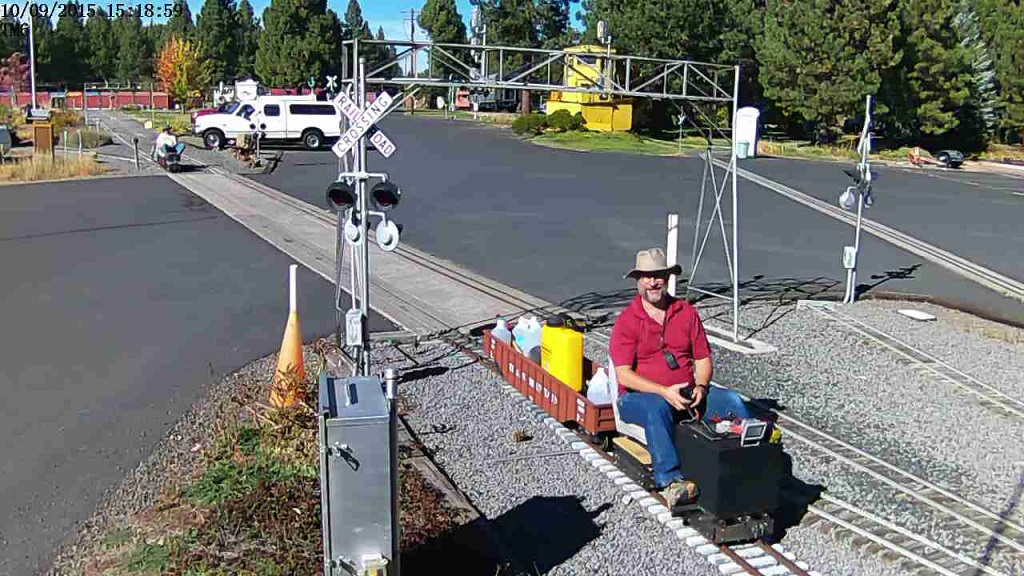
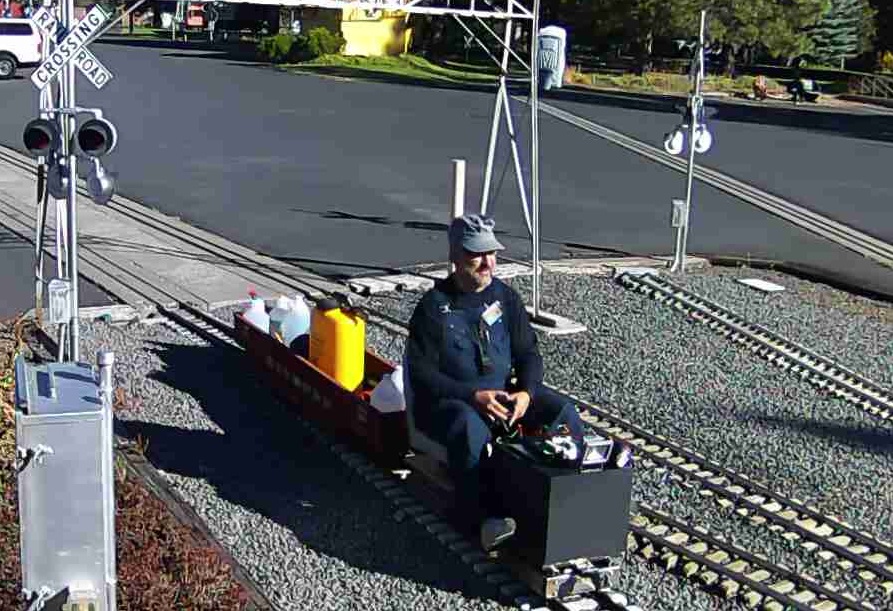
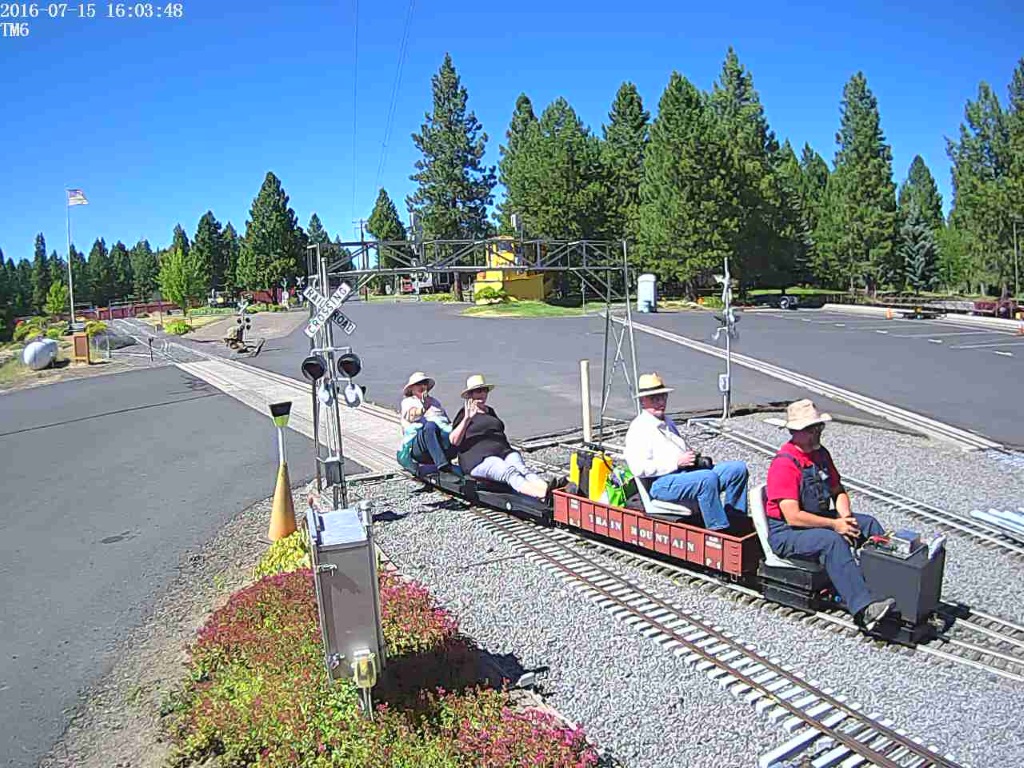
Since the first day had been such a success, it was time to do more running. There were a couple of young people visiting Train Mountain for the first time and we hooked up with them to be the first full load of passengers. A trip down the mountain to Midway Circle where we visited the (even) smaller scale railroad, then a trip back up the steep mountain to the Central Station. It is beginning to look like a real runner!
Hauling passengers. Wave at the camera!
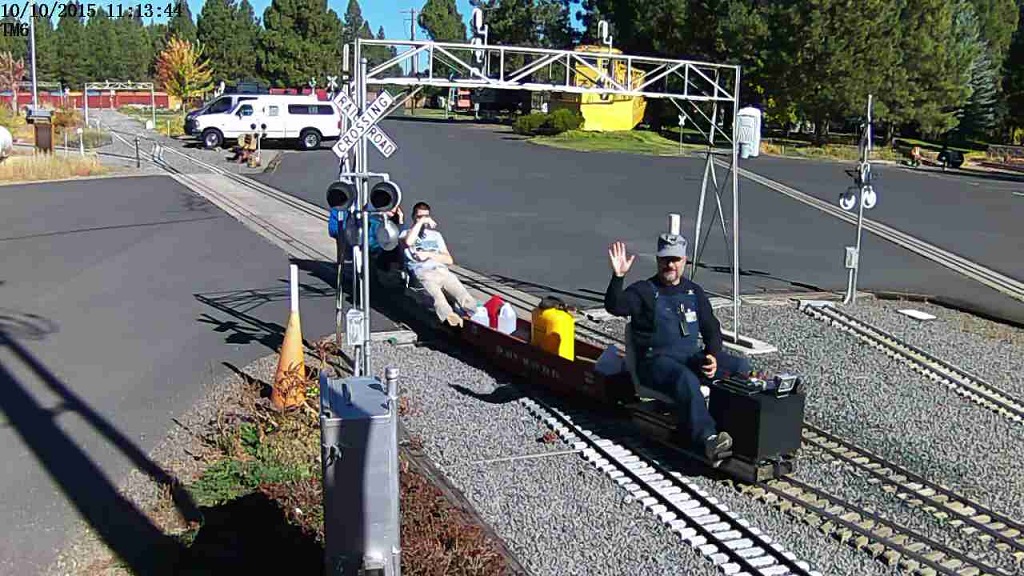
After a lunch break, there was a second set of visitors that wanted a ride and we set off again on the same route as the first set of passengers. When leaving Midway Circle I heard what I thought was a bell when crossing the second set of tracks. It turned out to be the chain from the front truck which had come off the sprocket due to the axle sprocket set screws coming slightly loose. I ran all the way up the Serpentine to Blue Caboose on one motor... It was a good test of the system, but one I hope not to repeat. We had to drop the passengers at Blue Caboose and I worked on the sprocket. I got it partly aligned but the chain would not stay on so I got an assist from Dick and we double headed up the hill to parking. It was not the way I wanted to test the front coupler, but what can you say..., it worked as it should.
Double heading past the camera. The wind was blowing and Dick was trying to keep his hat on!
The fix was accomplished at the parking bay. A flat was put on the axle (the rest will get this soon) to seat the set screw. Since it was almost time for the Fall Colors Banquet, the train was parked for the night.
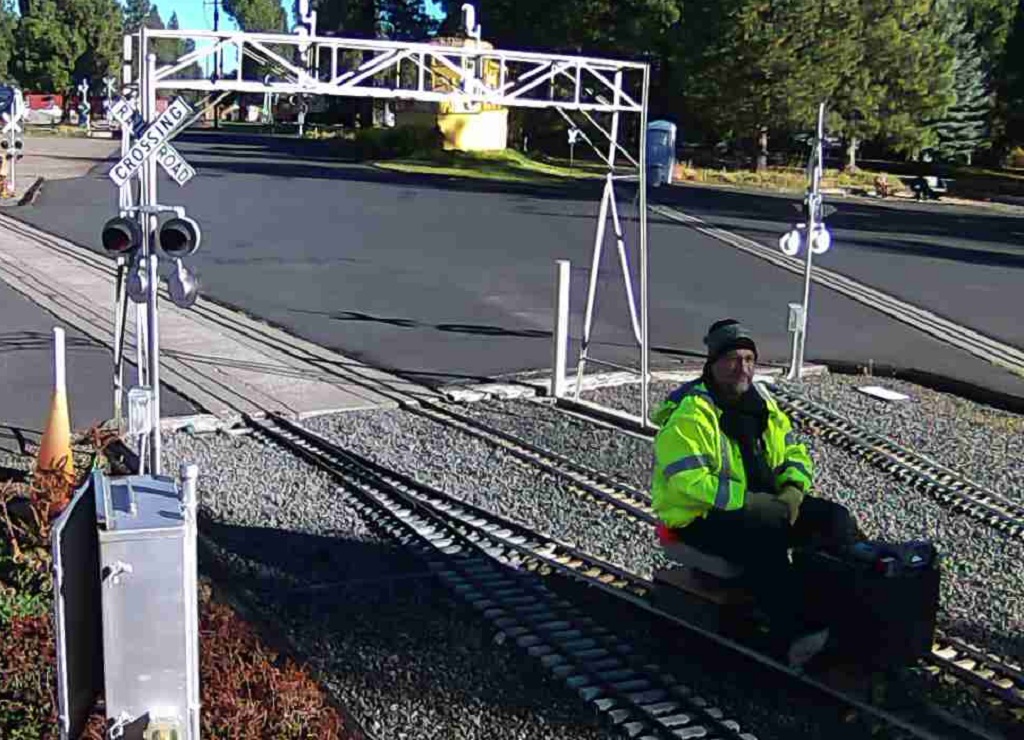
A cool (for AZ folk) Sunday morning run - 35 degrees F.
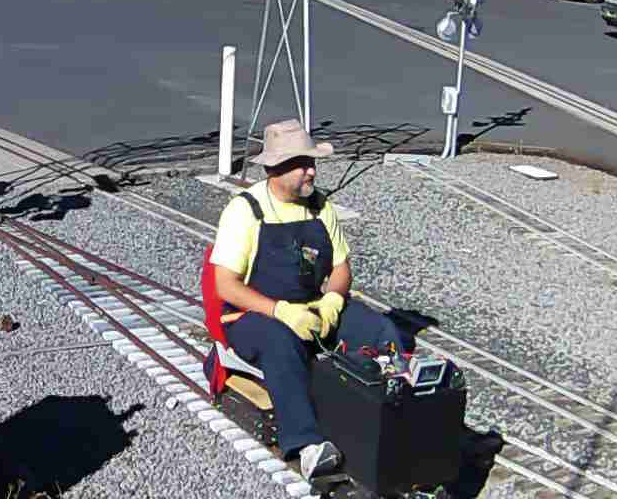
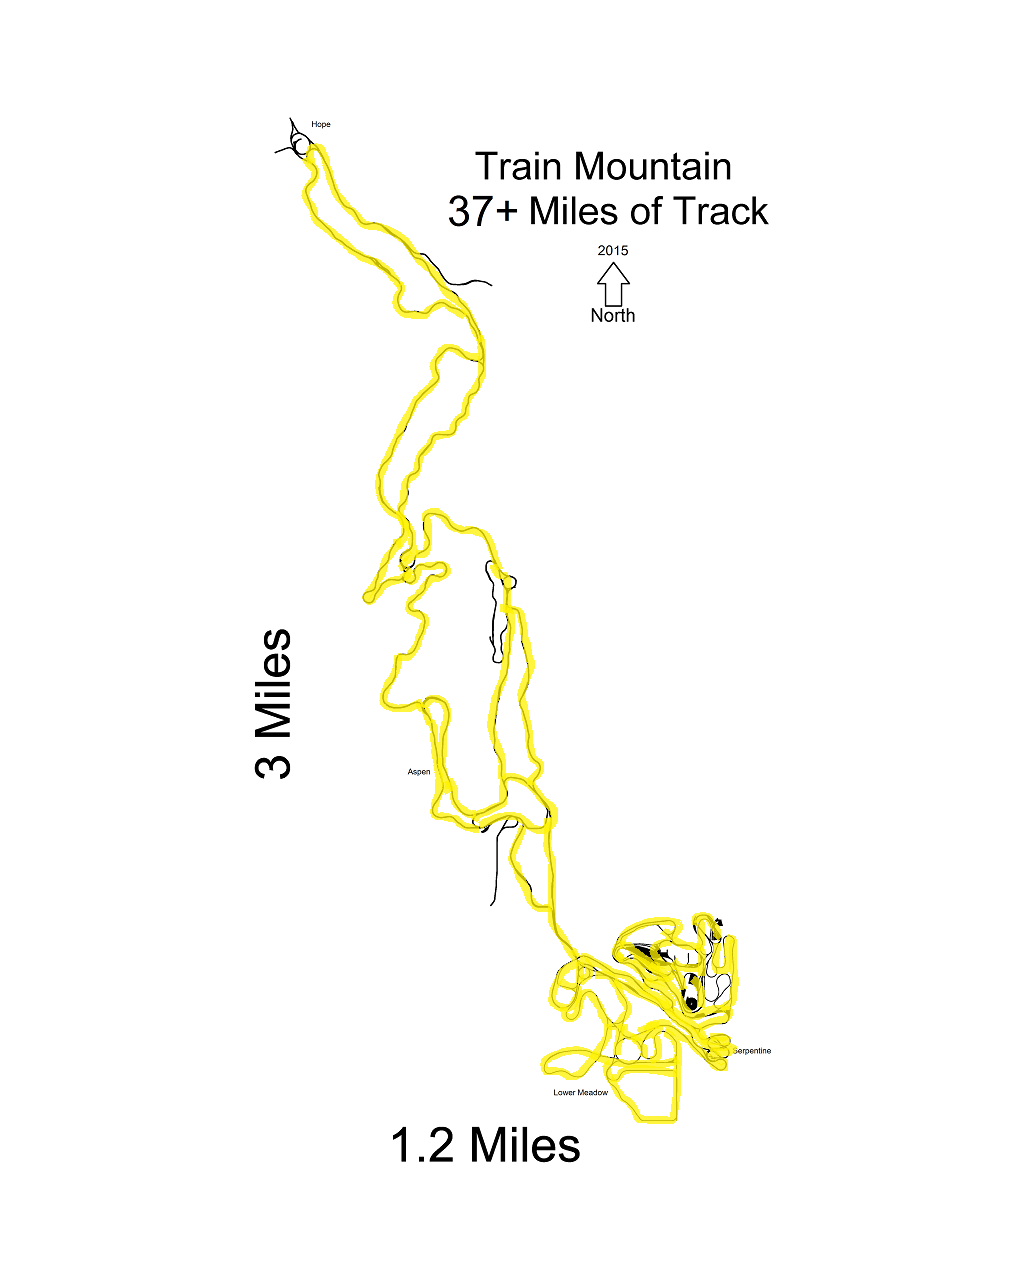
The last day of the Meet, I came around and dropped off the fire car, as the restrictions were not in effect. Dick was going to be busy getting his trailer ready to go north for the winter. I decided to run alone up to the far north end of the Train Mountain track. I had my radio and cell phone for assistance if needed. It was a beautiful but brisk day - the wind of the previous day had gone (with it many of the colorful leaf showings) and the little rain over night had washed the air. I mounted an "Action Camera" (a GoPro clone) to the locomotive and did a time lapse of the run. I went all the way up to Hope (the far north end) and got stopped at a malfunctioning light. It was determined that the light was not working properly and since a second intrepid train man had caught up to me, we proceeded slowly down the track. The battery ran out on the time lapse camera after about two hours, just as I was getting to Witcombe junction. You can see the video on YouTube, along with a couple others (link at the bottom of the page or search for KE7HR on YouTube).
I continued running through the Aspen Grove, up the Dam 3.5 loop, back to the Aspen Grove, then to the lower meadow and climbed every hill, did every loop, and generally had a grand time. I have now run the entire lower meadow track and climbed all of the hills at Train Mountain on my very own locomotive. There is still some track north of the portal that needs to see my wheels, but that can come on another trip. I had radio contact with Dick and also Morse code with the horn as I passed by. What could be better! Finally, it came time to put away since we had a dinner with another of the Train Mountain locals. It took a lot longer to put away than I had anticipated since many of the other train guys came over to look and talk about my little invention. Some suggestions on things but more praise than I had anticipated - people were impressed by the little locomotive and how well it ran on its first outing.
The battery life running up and down the hills at Train Mountain is very good. The regeneration effect charges the batteries while running down hills which really seems to extend the range. The batteries are rated at a 25 amp draw for 160 minutes. While I am drawing less than this on average (more instrumentation to be installed soon), I ran probably around 30 miles on the last day of the Fall Colors Meet and still had only used 15% of the battery capacity. I was not hauling a big load that day, but the battery life will still be very good for many miles of running.
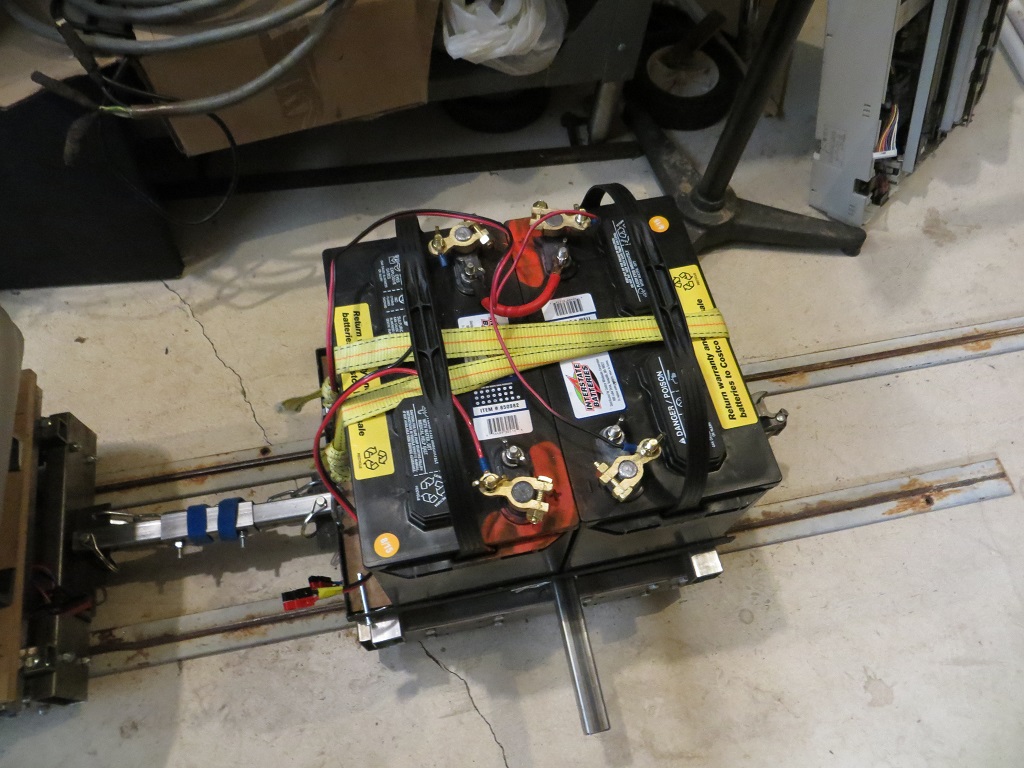
Batteries strapped in. The yellow nylon straps should help keep the batteries with the train if it ever goes sideways (let's hope not). The two 12 volt batteries are run in series to give 24 volts for the motors. There are also brass adapters on the battery posts which give an additional tie point to take power. The 12 volt accessories (horn, light, more stuff in the future) run off of the wires with the yellow tape near the connector ends and mate with the yellow taped connector on the battery cover - box cab.
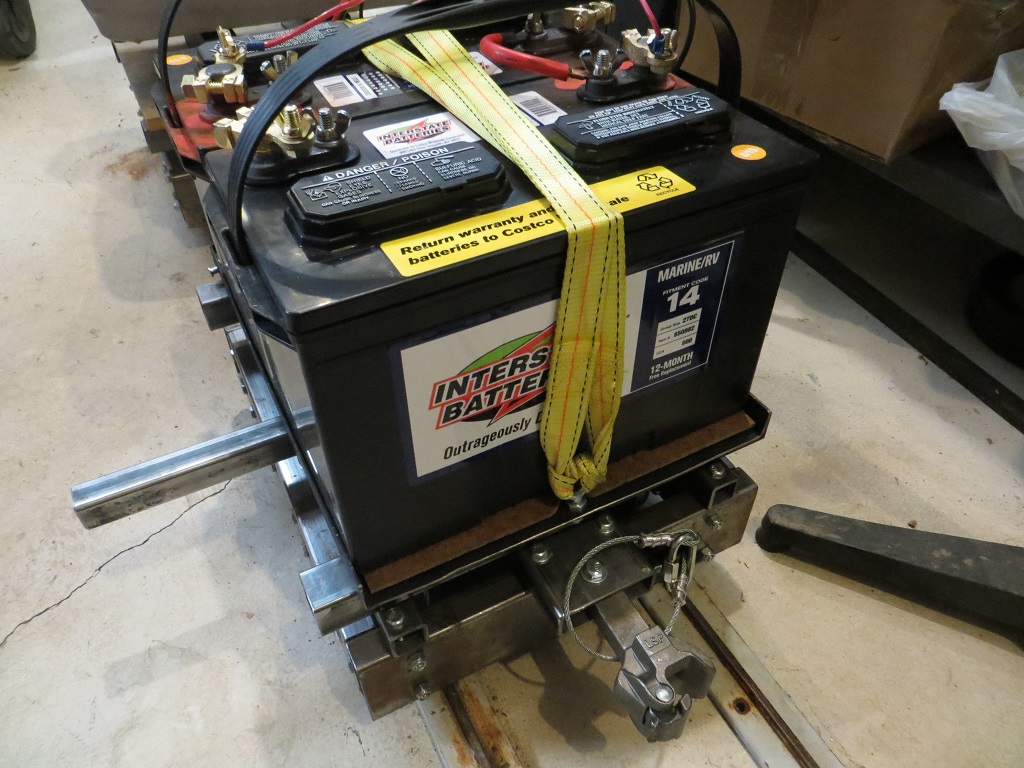
The battery tie down point in the front. Also visible is the front coupler (there is rubber inside to help keep the coupler centered) and the front safety cable. This is hooked to the equipment attached to the coupler in case of a de-couple event. Some of the downhill segments at Train Mountain are over a mile - run away cars could be dangerous! You can also see one side of the footrest bar which passes below the battery tray. It has pins to hold it in place and also make for easy removal for transport.
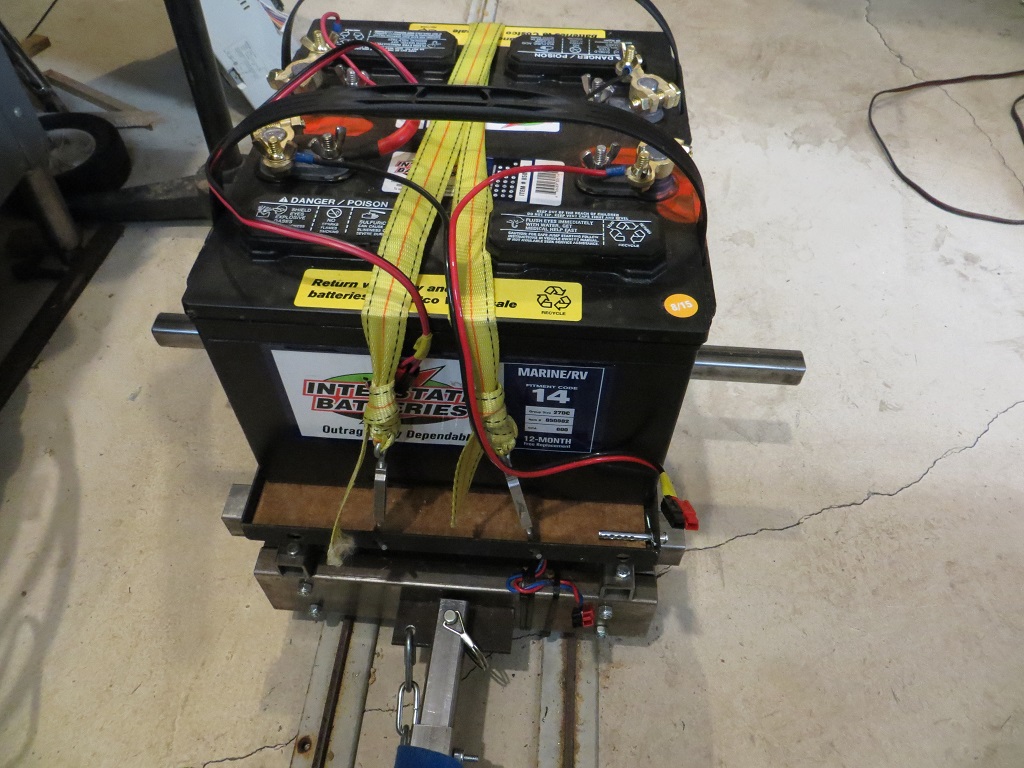
The rear of the battery tray has holes in the steel to allow turnbuckles to attach and tighten the tie downs. The connector with the blue and red wires near the lower right corner of the truck is the front motor connector. Also visible is the pin which goes through the wooden box cover to secure it to the locomotive.
Upcoming further improvements will be a better cover for the electronics, paint and possibly coverings for the rest. A riding car which will also fit in the Prius is also on the drawing board...
The goal of having an electric locomotive that I could ride and could be transported in the Prius was achieved. The two halves of the locomotive fit in the space behind the rear seat and still allow the hatchback to close! The batteries traveled up in the foot well of the passenger side to better balance the load, while the rear seat area held tools, spare parts, and clothes for the trip.
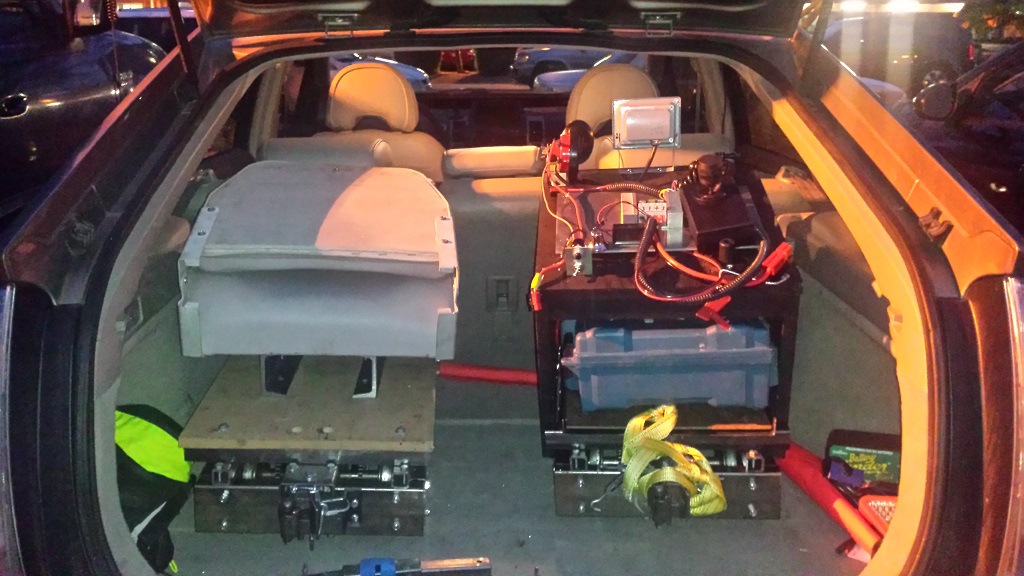
As you can see, the locomotive fits in the back of the Prius!
Click HERE to go to the Train Mountain
website.
TMRR track run with my locomotive during the Fall Colors Meet, 2015. Some left to do in the future!
2016
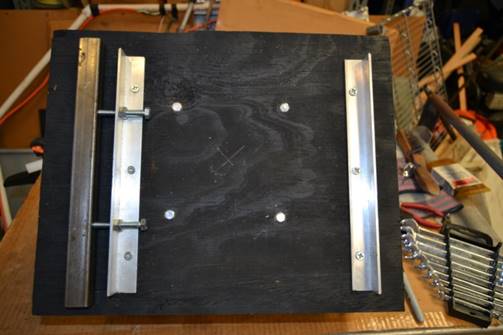
In anticipation of running at Train Mountain with passengers, I wanted to utilize the “other” seat that has started the whole journey, as a riding seat to be attached onto any of the gondola cars that were at The Mountain. The “fire cars” had plenty of space to seat a passenger as well as the firefighting equipment. The problem was that there were several different gondola widths. So, I made a seat base that was adjustable to mount on the gondola rail and be a snug fit.
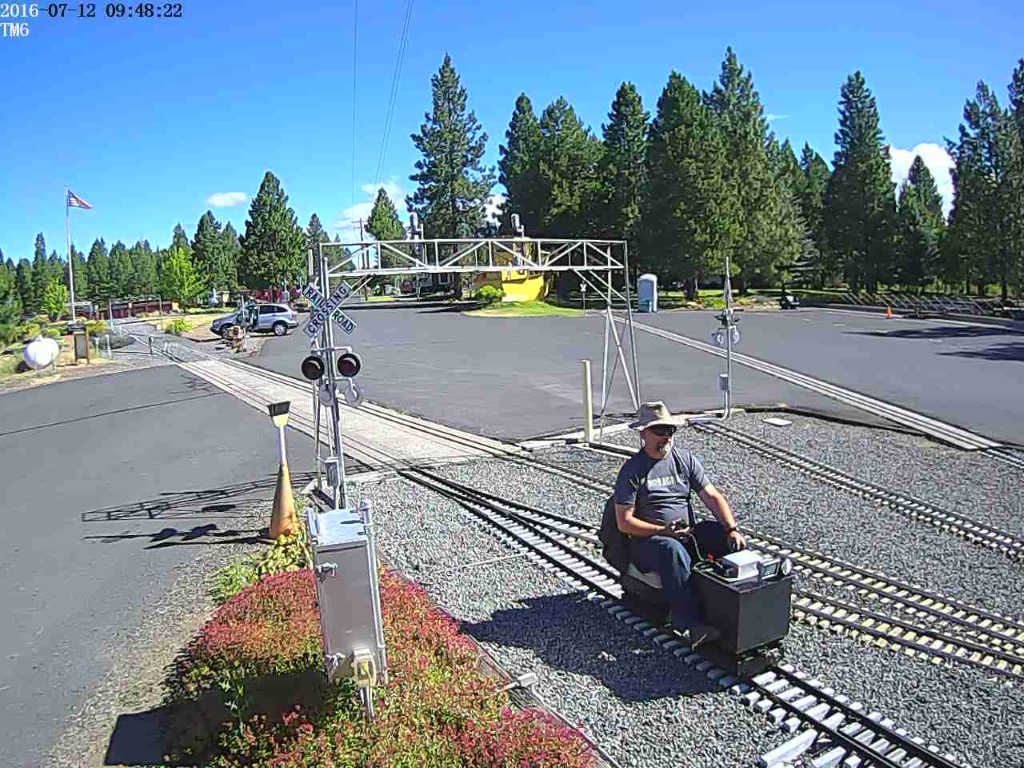
In July of 2016, my wife joined me at Train Mountain for a week of rail fun (and some nice Oregon sightseeing). A slight bit of extra work had been done to the locomotive to cover the speed control (not a very good looking job…) and to have some storage under the engineer.
The first day was a bit overcast and cool (for us Arizona adapted folk). A coat was required on the “test run”. Everything worked as expected. Later in the day, while coming out of one of the tunnels, a rock (which looked like a pinecone) right at the shadow edge banged into the front motor and broke one of the internal magnets away from the motor housing. Some time in the “backshop” with my tools and some “JB Weld” got me back on the rails.
With the epoxy cured, it was time to run again in bright sunshine. No apparent other damage to the motor.
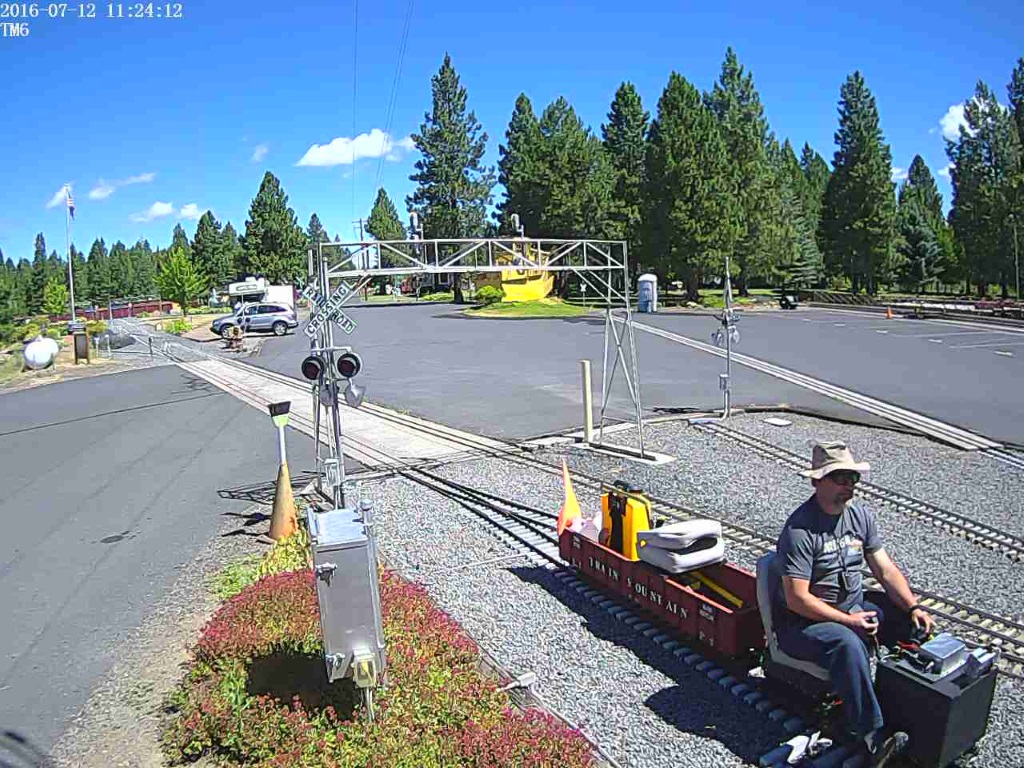
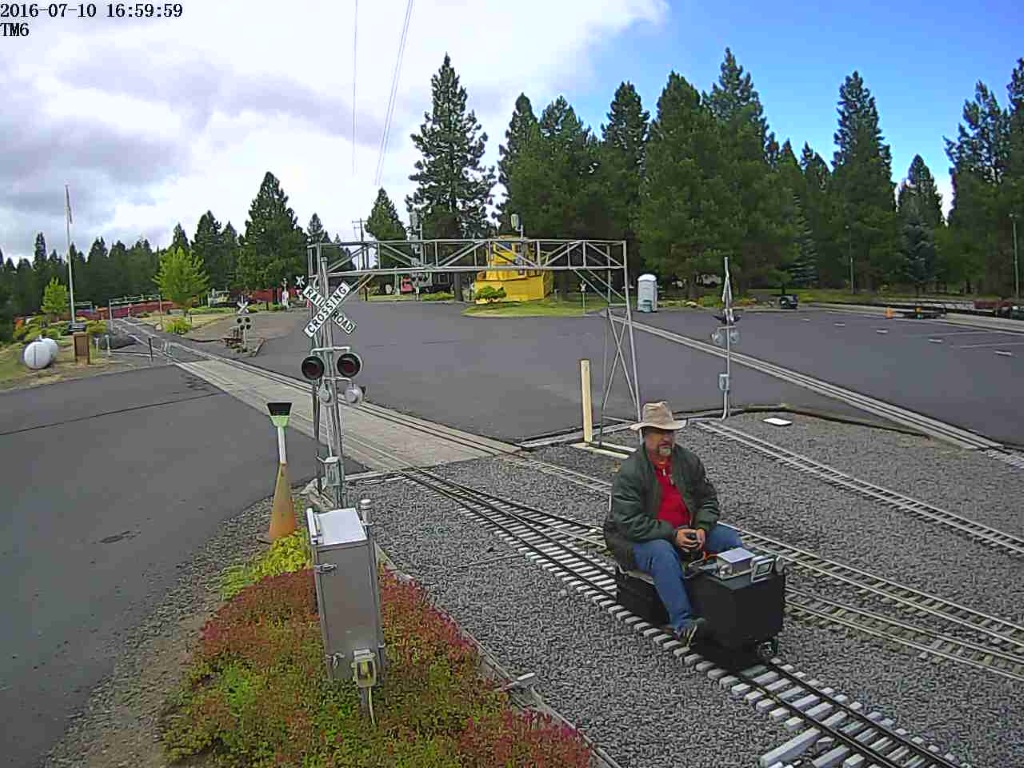
I went around and picked up a “fire car” and adjusted my seat to fit. It worked just as expected. Now it was time for a passenger!
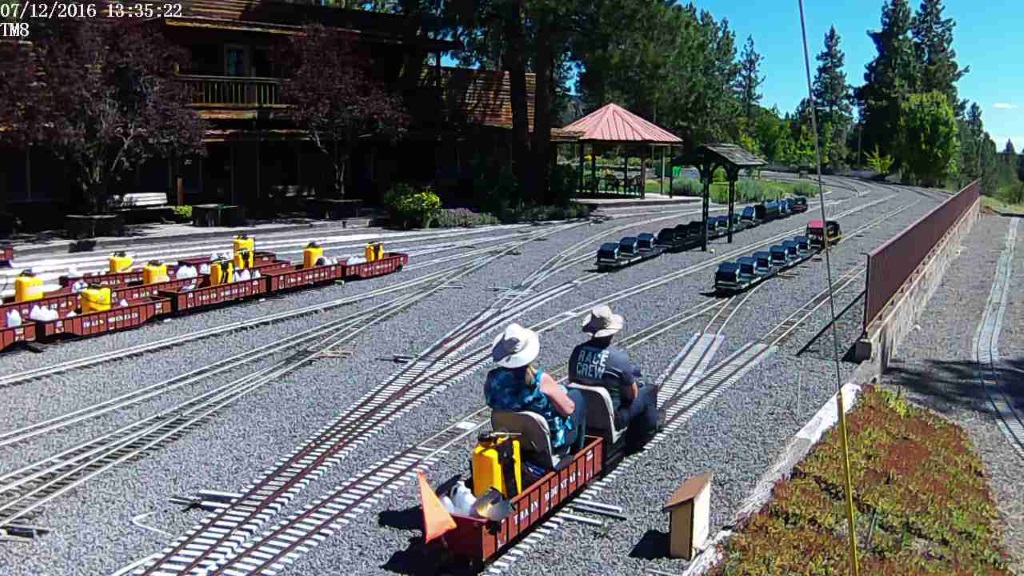
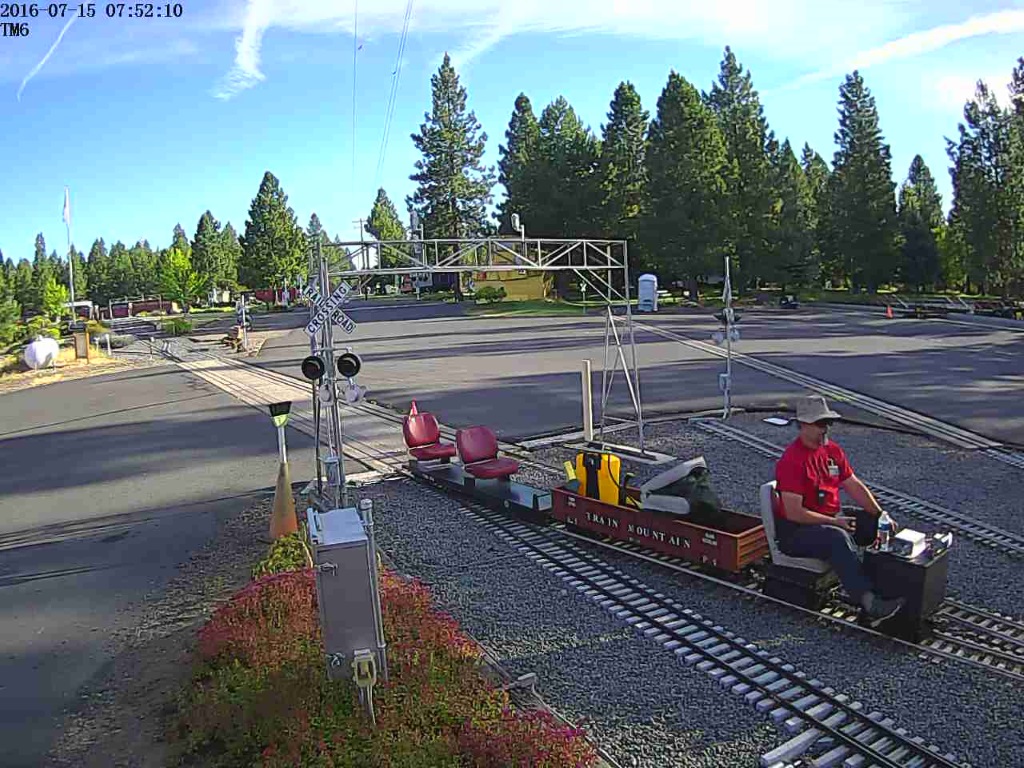
After a nice long ride the camera captured us returning from a lunch in the woods. The little locomotive had no problems running up and down the hills at Train Mountain.
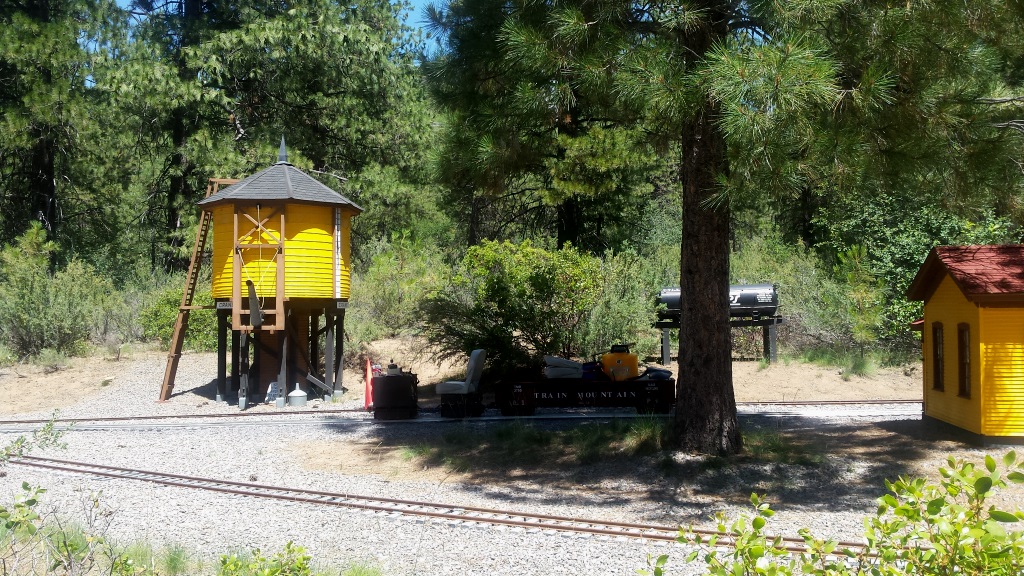
The little locomotive and riding car behind, parked in the shade at the Crane Siding - a great place to have a picnic lunch or take water, if it was a steamer.
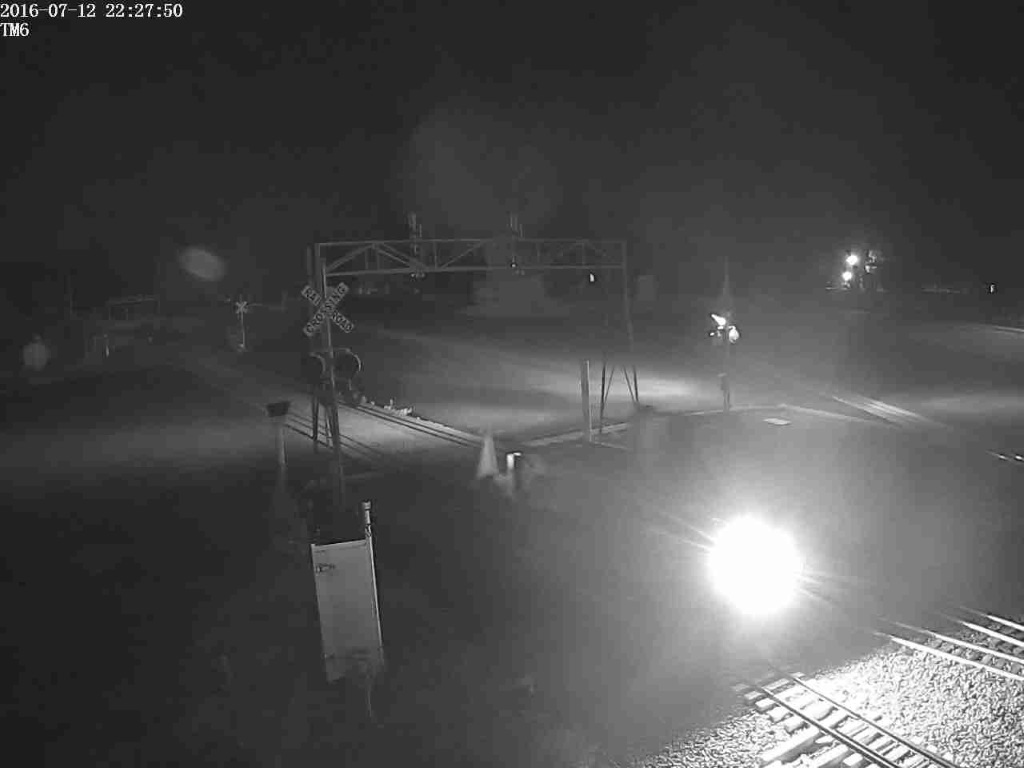
With a great light on the little locomotive, night runs are a breeze. The camera captured me returning to the yard at almost 10:30 pm. It was time to put it on the charger for the next day of running.
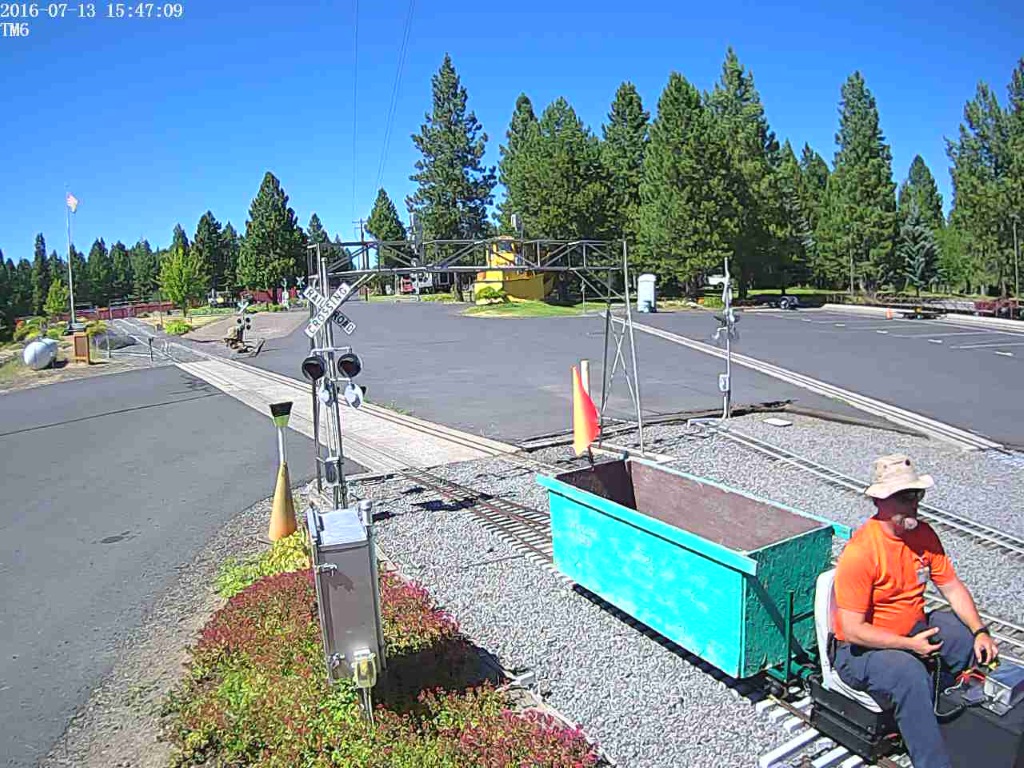
As a member of Train Mountain, some volunteer work is expected. During the week I helped out with some track work, some things in the back shop, and also moved many loads of pine cones and needles to the burn pit. TM has the big box cars and a selection of pitchforks and other implements to make the job as easy as possible. The photo shows me returning to the top of the hill after working for several hours down in the lower meadow area. It was time to put the tools and train away and have a cold adult beverage, while the charger got me ready for the next day of running. Charging is easy and the batteries were not very drained – a lot in part due to the regenerative braking which puts energy back into the battery bank (just like the Prius).
A day of sightseeing at Crater Lake (only about 20 miles away from TM) was fit into the schedule. Then it was a day to haul passengers. I got one of the riding cars from TM as well as the fire car. Guests were expected to come and have a picnic out in the woods and be pulled by my locomotive. Glad to oblige.
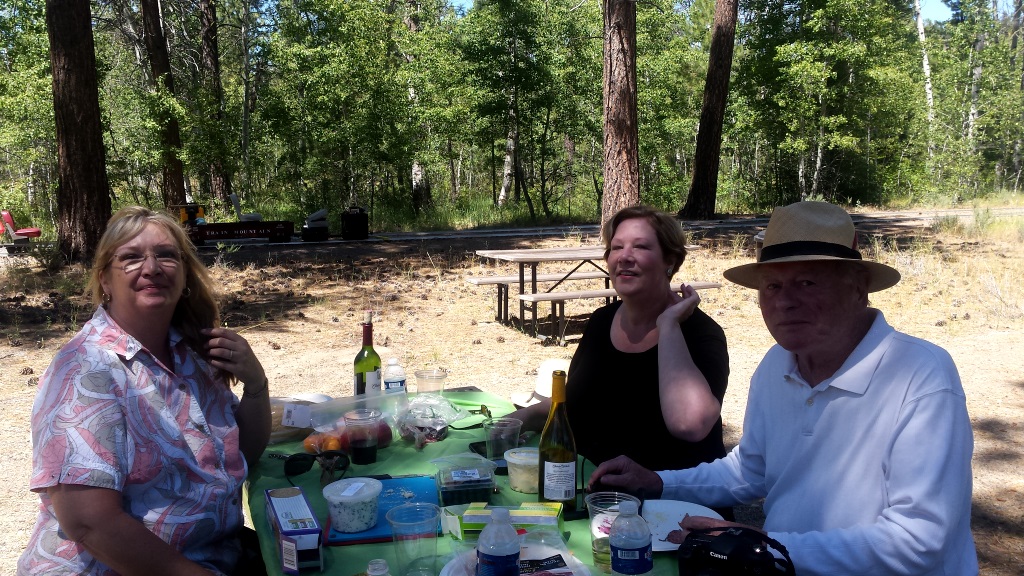
Here were the passengers and the picnic spread at the Logging Camp picnic area. Another great place to have a lunch in the woods, transported by your own train.
The camera captured us returning from the day on the railroad. My brother-in-law, Dick Cork, and sister-in-law, Marlene Carlson, enjoyed the day on the rails, the picnic spot, and the scenery. This load is about as much as I wish to pull up the hills at Train Mountain. After all, it is just two small scooter motors pulling the whole train! Near the end of the day, one of my drive chains was having an issue which I originally thought was the repaired motor trying to “give up”. Still, we got up the hill in good fashion!
2017
did not work out for a trip to Train Mountain with the locomotive. Instead, I picked up a Little Engines
0-6-0 project which will be the subject of some work to get it running –
several years, I expect.
2018
With
the New Year, a new paint job and a cleanup of some of the mish-mash that had
become the controls was in order.
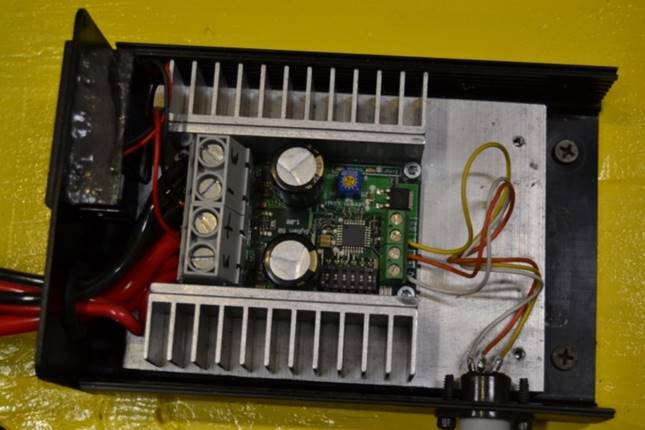
The
speed controller (SyRen 50 from Dimension Engineering)
was remounted onto a .5” thick aluminum plate, which was then mounted
into a nice aluminum box. This
should be a sufficient heatsink – the previous running hard had not given
any indication of heating. The
wiring was also cleaned up a bit with the hand control having a nice socket to
plug into.
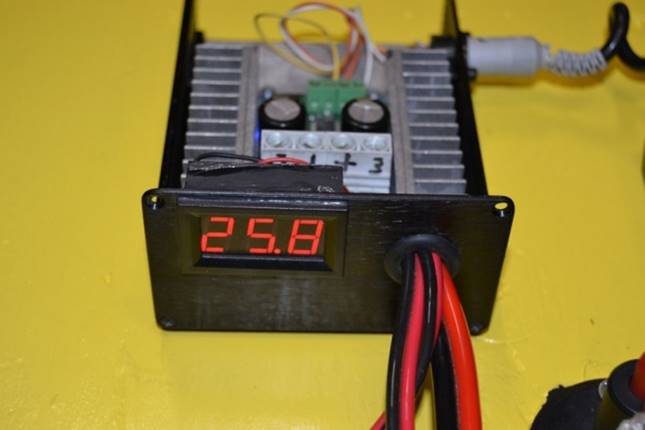
The
voltmeter mounted into the box – it was a tight fit, but works well. It allows me to see the battery voltage
and is the indication that the system is powered. This is a “24 volt” system
so voltage up to around 28 (charging) and the 25 range (running) are good. To prolong the life of the batteries, I
hope to never run them down to below 24.4 volts before charging.
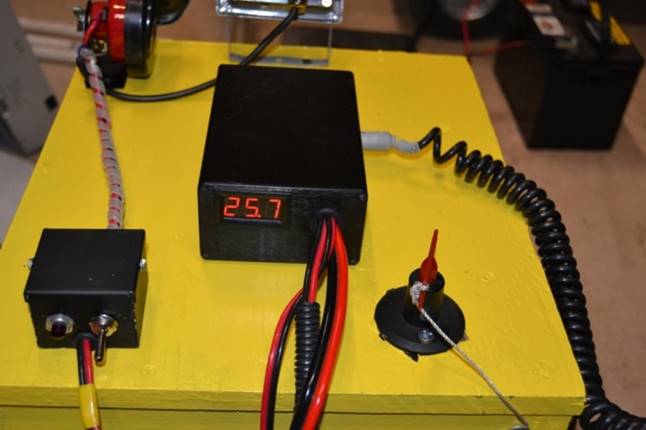
A
look at the new “top deck” before the labels went on the
switches. In addition to the
controller now living in a clean installation, the horn button and light switch
are now housed in a nice enclosure.
The red “key” on the lower right corner is the battery
disconnect switch – my “On/Off” switch for the system. The light and horn are powered by 12
volts and have a separate feed from just one of the batteries and the
“sound box” is run off of the other.
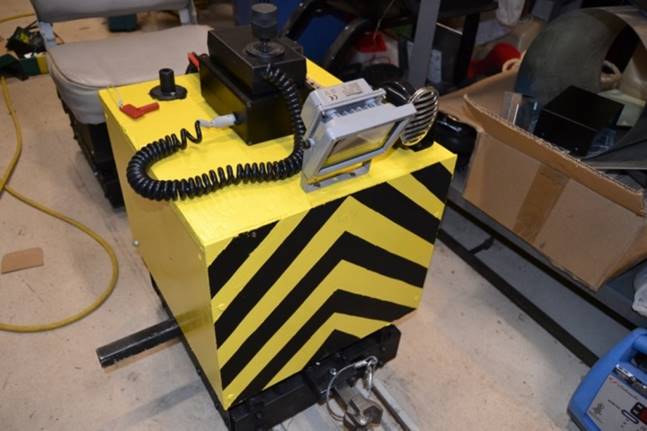
Look
at the new paint job on the Barstock Electric. I got tired of the flat black box and
decided that a bright yellow would be nice. The black stripe motif on the front will
help to warn people near the track that I am coming! That and the light and horn will do the
trick.
A
small video “walk around” showing the new paint job, control boxes,
and sound box can be seen at:
Barstock
Electric Walk Around 2018
The
video also shows the “sound box” that I added so that I can have a
bell sound (and many others) to warn people of train movement – the
Barstock Electric is pretty quiet running down the track.
This
video and Station To Station Scottsdale Live Steamers were shot at the
Scottsdale Live Steamers “mini-meet” on 18 February 2018.
I
will be running on the Scottsdale Live Steamers track at McCormick-Stillman
Park some this year. It is
undecided if the locomotive will make the trip to the Train Mountain Triennial
in 2018. I will be volunteering
there and there WILL be lots of other equipment to run!
Train Mountain Videos
I
created several videos at Train Mountain of running on the track with this
little locomotive and have them available on YouTube. I used an “action camera” to
record a photo every two seconds and then merged them into a video which is
“time compressed” greatly.
You do not get to see the locomotive, but what it looks like “out
the front”.
A
short run “around the top”.
Central Station to Midway to Blue Caboose
Down
the serpentine and then back up to the Blue Caboose campground.
Central Station to Hope to Witcombe
This
two hour sequence (in just about 5 and a half minutes) goes the far north point
and part of the way back – about 14 miles of running before the battery
on the camera quit.
There are also other train related videos that I have uploaded (like me running the steam locomotives) and other stuff at:
KE7HR
Railroad – “Barstock Electric”
locomotive made from bar stock – “Cave Creek and Northwestern -
2015”
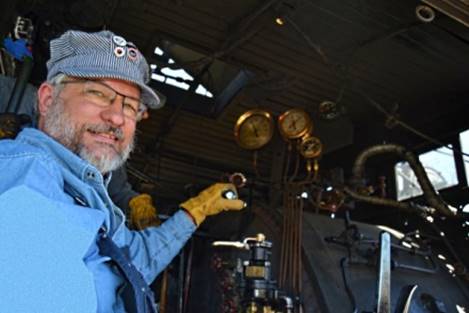
Not
my locomotive! It is the Nevada
Northern #40, on which I was “Engineer for the Day” – July
2016. Hand on the throttle, running
full speed up the hill.